Last updated November 18, 2026
Garage Conversion Contractor Troubleshooting: Common Problems and How to Fix Them
A converted garage that feels cold in January and costs twice as much to heat as the rest of the house isn’t a thermostat problem. It’s an insulation problem that got baked in when the contractor skimped on the wall and ceiling assembly to win a low bid. We’ve walked into dozens of finished conversions across North Las Vegas that looked fine on the surface and failed every comfort test the first cold snap delivered.
The pattern repeats: three steps get skipped, and everything downstream breaks. Inadequate insulation for a space never designed to be conditioned. An electrical service sized for a door opener and a shop light, not a living room. Moisture wicking up through a slab that was poured with no vapor barrier. This guide shows you how to diagnose which problem you actually have, what a real fix requires, and what cosmetics-for-repair looks like so you can spot it before you pay for it.
Quick Answer
Most garage conversion problems trace back to three skipped steps: insulation that doesn’t meet conditioned-space requirements, electrical service that was never upgraded from the original garage circuit, and moisture moving through an unsealed slab. A legitimate fix addresses the cause (new wall and ceiling assembly, a load calculation and panel assessment, a vapor barrier and subfloor system) rather than covering it. Cosmetic patches fail within one or two seasons.
Table of Contents
- Why Is My Converted Garage Cold in Winter and Hot in Summer?
- How Do You Diagnose a Moisture Problem From the Original Slab?
- HVAC Troubleshooting: Undersized Unit or Bad Duct Design?
- Why the Original Garage Circuit Is Almost Never Enough
- What to Do After a Failed City Inspection on an Occupied Conversion
- How a Written One-Year Guarantee Changes Contractor Incentives
- Bringing an Unpermitted Conversion Into Compliance
- Common Mistakes to Avoid
Why Is My Converted Garage Cold in Winter and Hot in Summer?
Because the wall and ceiling assembly was built like a garage, not like a room. Original garage walls typically have no cavity insulation at all, just drywall or sheathing over bare studs. When a conversion crew skins over those walls without opening them up, the assembly’s R-value stays near zero, and no amount of HVAC output keeps up. The ceiling is usually worse: an uninsulated attic space above a garage can hit 140°F in a North Las Vegas summer, and that heat radiates straight down into your new room.
Diagnosing it doesn’t require opening walls. Here’s what to check first:
- Touch test in the afternoon. On a hot day, press your palm against an exterior-facing wall. If it’s noticeably warm to the touch, that wall has little to no insulation.
- Infrared thermometer readings. A $30 infrared gun pointed at the ceiling, walls, and floor will show temperature differentials. A 10°F or greater spread between interior surfaces and room air points to an assembly problem.
- Utility bill comparison. Compare your pre-conversion and post-conversion bills for the same months. A jump of 50% or more for one added room usually means the thermal envelope is failing.
- Attic check. Look above the converted ceiling. If you see bare joists with no insulation batts, blown-in material, or rigid foam, that’s your biggest heat loss path.
The real fix involves opening the walls, installing insulation to meet the local energy code (North Las Vegas sits in a climate zone that requires meaningful R-values in walls and ceilings), sealing air gaps at the perimeter, and re-drywalling. It’s invasive and it’s the correct answer. Blowing insulation into a closed cavity through small holes is a partial fix that leaves thermal bridging and air leaks in place. You can read more about how we approach this on our Garage Conversion Contractor in North Las Vegas page.
How Do You Diagnose a Moisture Problem From the Original Slab?
Original garage slabs in North Las Vegas were typically poured without a vapor barrier underneath, because the space wasn’t meant to be lived in. Concrete is porous. Moisture from the soil below wicks up through the slab and evaporates into the room, raising indoor humidity, warping flooring, and creating the musty smell you can’t get rid of with air freshener. It’s the single most common problem we find in conversions that were finished over the original slab surface.
Signs to look for
- Flooring that lifts at the edges, cups, or shows dark staining patterns
- A persistent musty or “basement” smell during humid months
- Efflorescence (white chalky powder) at the base of walls where they meet the floor
- Soft or crumbly drywall at the bottom six inches of the wall
- Condensation on cold interior surfaces in the morning
The proper test
Tape a 2-foot square of clear plastic sheeting to the slab, sealing all four edges, and leave it for 24 to 48 hours. If condensation forms on the underside of the plastic, moisture is moving up through the slab. A calcium chloride test or an in-situ relative humidity probe gives you a numeric reading if you want documentation.
What real remediation requires
- Remove the existing finish flooring and any organic underlayment.
- Grind the slab surface to open the concrete pores.
- Apply a proper moisture-mitigation coating or a self-leveling vapor barrier membrane rated for the moisture load, not a paint-on sealer from a big-box store.
- Install a subfloor system designed for below-grade or on-grade applications: rigid foam panels with a vapor barrier and plywood layer, or a dimple-mat system, before finish flooring goes down.
- Verify drainage on the exterior side so water doesn’t pool against the slab edge.
Cosmetic fixes (a moisture-blocking primer, luxury vinyl plank “rated for wet areas,” extra dehumidifiers) mask the problem for one to two years and then fail. If your conversion was finished over the original slab with no mitigation, this is the first thing to correct.
HVAC Troubleshooting: Undersized Unit or Bad Duct Design?
Both problems produce the same symptom: a room that never reaches the thermostat setting even though the equipment runs constantly. You need to know which one you have before you spend money, because the fixes are completely different. An undersized unit needs to be replaced. A bad duct system can often be corrected without touching the condenser.
Here’s the diagnostic shortcut:
- Check the temperature at the supply registers. Air coming out of a properly charged system should be 15°F to 20°F cooler than the return air during summer. If the supply air is cold but the room stays warm, the equipment is likely fine and the distribution is failing.
- Check airflow from each register. Weak flow at registers farthest from the air handler points to undersized ducts, crushed flex duct, or excessive run length.
- Count the added square footage. A manual J load calculation tells you what the added space actually requires. If your conversion added 350 square feet of conditioned area and the original unit wasn’t upsized or re-engineered, the equipment is almost certainly undersized.
- Check for return air. A converted room with no dedicated return, or one that relies on a door undercut for return air, will always be pressure-imbalanced and uncomfortable.
The correct fix starts with a manual J load calculation and a manual D duct design. If the load calculation shows the existing unit can handle the added square footage, the fix is duct work: resizing, re-routing, adding a dedicated return, or installing a mini-split system dedicated to the conversion. If the load calculation shows the equipment is undersized, you’ll need a larger unit or a supplementary system. Skipping the load calculation and guessing is how homeowners end up paying for a new unit they didn’t need. This is the kind of engineering work that separates a real conversion specialist from a framing crew with a side business, and it’s one more reason to work with a contractor who handles it as part of the scope.
Why the Original Garage Circuit Is Almost Never Enough
An original garage circuit was sized for a 100-watt bulb, a door opener, and a shop vacuum. It’s typically a single 15- or 20-amp circuit, and it has no provision for a room that will have lighting fixtures, an outlet every six feet, a space heater or mini-split, a ceiling fan, television, and a home office or bedroom setup. Code requirements for living spaces call for dedicated circuits, GFCI protection where applicable, AFCI protection on bedroom circuits, tamper-resistant receptacles, and proper outlet spacing. None of that exists in a garage circuit.
A proper panel assessment looks at four things:
- Available capacity. Load calculations on the existing panel determine whether the service can support the added circuits. Most home panels have room; some older 100-amp panels do not.
- Circuit count. A conversion typically needs 4 to 8 new dedicated circuits, depending on whether it has a kitchenette, bathroom, or laundry area.
- Panel age and bus condition. Panels with known failure modes (certain Federal Pacific and Zinsco models, for example) need to be replaced before new circuits go in. A licensed electrician should make that call.
- Grounding and bonding. Older panels sometimes have grounding issues that surface when new circuits are added.
Wiring a converted garage is not a weekend project. A licensed electrician pulls the permit, does the work, and gets it inspected. Any conversion where the contractor reused the original garage circuit for a living space is a conversion with a documented code problem, and that problem will surface at the first inspection or the first insurance review.
What to Do After a Failed City Inspection on an Occupied Conversion
You already live in the space, and the city just red-tagged or failed it. This is the situation we get called into most often in North Las Vegas, and the fear is always the same: will I have to tear out the whole thing? The answer is almost always no, but you need to move methodically.
Here’s the sequence:
- Get the written correction list. The inspector has documented exactly what failed. Don’t act on a verbal summary. Get the written notice and read every line item.
- Pull the permit file. If the original conversion was permitted, the file shows what was inspected and approved. If it was never permitted, you’ll need to start the process from the beginning, which usually means opening walls for inspection and bringing the work up to current code.
- Get a licensed contractor’s assessment of the correction list. Not a verbal estimate. A written line-item scope that addresses each correction, with the permit pull and inspection schedule stated explicitly. This is where the honest number gets established before anyone picks up a tool.
- Schedule the re-inspection correctly. Inspectors typically look for the same things on the re-inspection that they flagged the first time. Don’t skip items because they “look fine.”
- Document everything. Photos, permit numbers, inspection reports, correction letters. If you ever sell the house, this file is worth more than the finish work.
Failed inspections on occupied conversions in North Las Vegas most often trace to electrical (no permit, wrong circuit protection), structural (header or beam work done without engineering), or egress (window size or escape path non-compliant). Several of these can be corrected without demolishing the finish work, but you need a contractor who has been through the process before. Fielding ADU Builders North Las Vegas handles permitted work and inspections as part of the scope on every project. Our ADU Builders in North Las Vegas team works these correction cases regularly.
How a Written One-Year Guarantee Changes Contractor Incentives
On a handshake job where the contractor has already been paid, moisture and thermal problems are your problem the moment they close the truck door. The contractor’s incentive to fix anything ends at final payment. That’s the incentive structure that produced the cold, damp, expensive conversion you’re living in. A written guarantee changes it.
The Garrison Standard covers workmanship defects for 365 days. If something fails, we come back and make it right at no charge. That’s in writing before a single nail is driven, and it applies to every project we build. Practically, that means three things for you:
- Moisture problems have to be designed out, not ignored. If we build a conversion over a slab with no vapor barrier mitigation and moisture damages the flooring in six months, we’re doing the remediation on our dime. That reshapes every decision at the design stage.
- Thermal performance gets tested, not assumed. A one-year guarantee puts the burden of a failing wall assembly on the contractor. We test the envelope before we hand over keys.
- The finish line doesn’t move. “We’ll come back when we have time” isn’t a guarantee. A written scope with a return visit is.
The written price also matters here. The price goes in writing before any work starts, so the number you approve on day one is the number on the final invoice. That’s the whole mechanism: written price, permitted work, written guarantee. It’s how we’re structured and how the Room Addition Contractor in North Las Vegas side of our work operates too. If you want a sense of what a properly structured conversion runs in North Las Vegas, garage conversions typically priced in the local market range from the mid-$30,000s into the $70,000s before permit fees, depending on scope and finish level. Those are real numbers, not teaser numbers.
Bringing an Unpermitted Conversion Into Compliance
An unpermitted conversion is common, and it’s correctable, but the path matters. North Las Vegas code enforcement treats living space without a permit as a real problem at resale, at insurance review, and after any future inspection. Getting it legal is a process, and it takes patience and a licensed contractor willing to walk through it with you.
The compliance path, step by step
- Call the city and ask about the existing structure. You’ll typically need to file as a retrospective permit or a legalization process. Ask specifically what plans and inspections are required.
- Open walls for inspection where the city requires it. Framing, insulation, plumbing rough-in, and electrical rough-in inspections usually require exposed work. Drywall comes back after the rough-in inspection passes.
- Bring non-conforming work up to current code. Egress windows, smoke and CO detectors, electrical circuit protection, insulation R-values, and structural connections are the typical correction items.
- Pass final inspection and record the completion. Get the signed-off permit card and keep it with your home documents.
The inspection list in North Las Vegas often includes items the original conversion skipped without malice (a hand-drawn layout that never went to plan review, for example). The fix is usually straightforward. Fielding ADU Builders North Las Vegas has the experience to walk a homeowner through this without incident. Our Fielding ADU Builders North Las Vegas home page has more on the process.
Common Mistakes to Avoid
- Skipping the load calculation on the HVAC. Guessing at equipment size produces an undersized unit or an oversized one that short-cycles and never controls humidity. If your contractor can’t produce a manual J, find another contractor.
- Finishing over the original slab without a vapor test. A $5 plastic sheet test takes 48 hours and tells you whether the floor finish will fail within two years. Do it before any flooring quote.
- Reusing the garage circuit without a panel assessment. If nobody looked at the panel, nobody knows if it can carry the added load. This is the mistake that produces the failed inspection.
- Insulating through holes instead of opening the assembly. Small-hole blow-in work leaves thermal bridging and air leaks. The room stays uncomfortable and you can’t inspect what you paid for.
- Building without a permit in North Las Vegas. The correction costs more than the original permit would have. If the contractor suggests skipping the permit to save time, walk away.
- Accepting a verbal guarantee. A handshake promise is not a warranty. Get the guarantee in writing with scope, duration, and the remedy process spelled out, or you don’t have one.
- Choosing the low bid without a scope comparison. The low bid is frequently the one that skipped insulation, skipped the panel, and skipped the vapor barrier. Compare line by line before comparing price.
When to Call a Professional

Some problems are diagnostic; some are dangerous. If you smell musty air or see flooring cupping, you can investigate with a plastic sheet test. But if you’re planning to open a panel, add circuits, work around gas, or correct structural framing, that’s licensed-trade work, and the wrong move there has real consequences. Same goes for any correction that requires opening a wall assembly where moisture has reached the framing; the surface fix masks rot, and rot spreads. If your conversion failed an inspection, if your HVAC can’t keep up with the added square footage, or if the moisture problem has returned after a cosmetic fix, call a professional who can diagnose the cause and quote it in writing.
Fielding ADU Builders North Las Vegas offers free estimates in North Las Vegas. Call (844) 797-5166. Live person answers every call, 24 hours a day, 7 days a week, and every crew member is background-checked and arrives in uniform.
Frequently Asked Questions
Cost correction work in North Las Vegas usually runs $3,000 to $12,000 for a fixable conversion, and $15,000 or more if the work involves opening walls for insulation and moisture mitigation. The cheapest correction is discovering the problem before you finish the interior. The most expensive is doing it in the order of the low bid: skip the diagnostic, install the finish, and then pay to tear it out. Call (844) 797-5166 for an exact quote on your conversion. Estimates are free.
Yes. Any conversion that changes a garage to habitable space requires a building permit, plus electrical, plumbing, and mechanical permits as applicable. The city reviews plans, inspects the rough-in, and inspects the final assembly. Skipping it produces a legalization problem at resale and an insurance problem from day one. If your conversion is unpermitted, the correction process is straightforward with the right contractor. Call (844) 797-5166 to get a scope and a permit plan for your conversion.
It can, yes. A conversion with no cavity insulation in the walls and no ceiling insulation above will lose heat at a rate the original HVAC equipment can’t offset, and the system runs constantly to compensate. The energy bill jump is the first clue that the thermal envelope is failing. Call (844) 797-5166 if you want a load calculation and an envelope inspection before you decide whether to correct the assembly. Estimates are free.
Sometimes. Electrical and HVAC corrections usually don’t require full interior demolition. Moisture mitigation almost always does, because the slab and subfloor assembly has to be corrected. Insulation correction usually requires opening the walls. A contractor who tells you the moisture problem can be fixed with a coating and no demolition is telling you they plan to mask the problem. Call (844) 797-5166 to get an honest assessment of what your specific conversion needs.
An undersized unit means the equipment itself can’t move enough BTUs for the space. A bad duct system means the equipment is fine but the air can’t reach the room. Check the temperature at the supply registers: if the air is cold at the register but the room stays warm, the equipment is fine and the ducts are failing. A manual J and manual D calculation answers which one you have. Call (844) 797-5166 if you want that calculation done correctly before you spend money on a new unit.
The Garrison Standard covers workmanship defects for 365 days and we return at no charge to correct anything that fails within that period. Moisture mitigation failures, thermal envelope failures, and installation defects are workmanship issues, so they’re covered. The guarantee is spelled out in writing before any work starts. That’s the whole point of having it in writing: the contractor’s incentive to get the assembly right is baked in before the check clears. Call (844) 797-5166 for details on how the guarantee applies to your project.
The Bottom Line
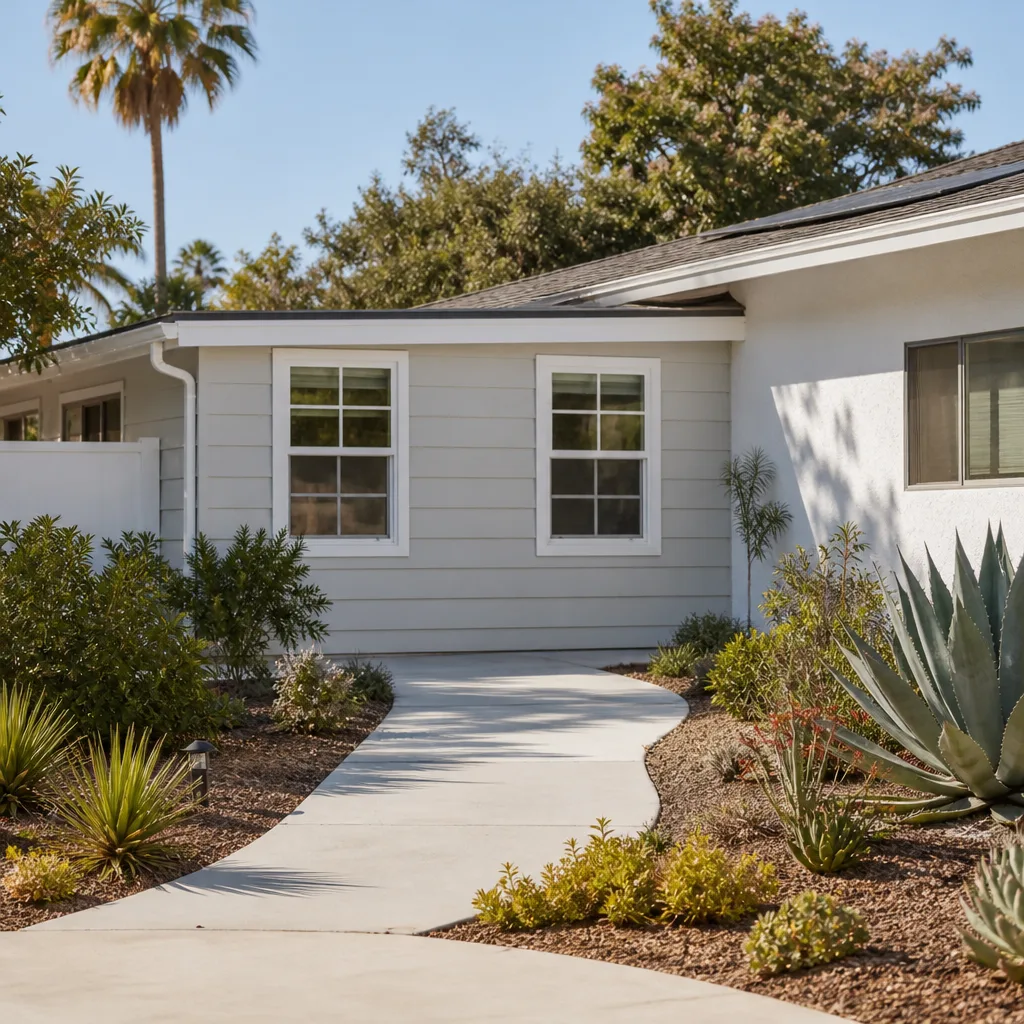
Garage conversions fail in predictable ways, and most of them trace back to the same three skipped steps: no real thermal envelope, no electrical service upgrade, and no vapor barrier under the original slab. Diagnosing which problem you have takes a weekend of testing, an HVAC load calculation, and a panel assessment. Fixing it correctly means opening the assembly and addressing the cause, not covering it. The good news is that every one of these problems has a documented fix, and a contractor who prices in writing and stands behind the work for a full year is the right contractor to hire.
Fielding ADU Builders North Las Vegas is an independently owned and operated member of the Garrison Partners family. We build to The Garrison Code every project: show up in the window, price in writing, by the book, leave it clean, stand behind it for a year. Our technicians have up to 20 years of experience, and we work with the major prefab and modular ADU platforms including Abodu, Cover, Dvele, and others, plus conventional builds using materials like James Hardie siding. Call (844) 797-5166 to schedule your free estimate in North Las Vegas.
Written by the team at Fielding ADU Builders North Las Vegas.